Monday 31 August 2015

References

Youtube videos: 
1.       Michelle Phan. (2013, January, 7) . 1 Minute DIY : Olive Oil + Honey Mask. Retrieved from 

2.       Cloudy Coconut. (2014, July, 16). DIY Coffee Body Scrub. Retrieved from

3.       Pop Sugar Girl's Guide. (2013, December, 12). DIY Bib Necklace with Evelina Barry. Retrieved from
4.      
LaurDIY. ( 2013, July, 24) . Apartment Decor DIY: Mirror to Chalkboard. Retrieved from
5.      
Mr. Kate. ( 2013, June, 9) . DIY Flower Lampshade with Mr. Kate. Retrieved from
https://www.youtube.com/watch?v=Vlc9KDOVjcE
6.      
Andreas Choice. (2011, July, 7) . DIY  Hobo Bag (no cutting required) - AndreasChoice. Retrieved from
https://www.youtube.com/watch?v=4AL-aTGVkSc
7.      
Pink Chocolate Break. ( 2014, August, 29) . DIY Color Blocking Shoes | Back To School DIY. Retrieved from
https://www.youtube.com/watch?v=i9s7KcvdFns
8.      
HGTV. ( 2014, July, 8) . DIY Paper Party Disco Ball. Retrieved from
https://www.youtube.com/watch?v=h4-ZjITd358Tasvana. ( 2014, June, 1). DIY Clothespin Picture Frame. Retrieved from
https://www.youtube.com/watch?v=kWLH1nOiu58
9.      
ICON. ( 2015, May, 2) . DIY: Desktop Organizer from Old Jars ∞ Trash to Fab w/ AnneorShine. Retrieved from
https://www.youtube.com/watch?v=gPkyRg6GKMM
Images:


Link:
13.   Manuka Honey. (2015). Retrieved from


D-I-Y Project : Decor Hacks 5 : Clothespin Reused Picture Frame!

Hello bunnies! 

Greetings to everyone who currently visiting my blog! Please click on the follow button and stay tuned with the DIY project ideas! As for the DIY Decor Hacks 4 of the day, I want to share a decor that you can hang your pictures, polaroid pictures or anything memorable on the frame! The tutorial of the video is from Tasvana  youtube account. Visit her youtube channel for more DIY hacks!


What you'll need:
Clothespins
Some roll of twine
Scissor
Hot glue gun
Picture frame


Step 1: Measure the length of the frame using the twine. Double the twine

Step 2: Tie the twine to the frame


Step 3: By using a hot glue gun, glue at the back of the frame so that it would stay in place


Step 4: Take your clothespins and hang your pictures to the strings!!


Lydia, x

Sunday 30 August 2015

D-I-Y Project : Decor Hacks 4 : Fancy Desktop Organizah!

Hello DIY-ers!

I really love this idea of doing a desktop organizer by using JARS. It is so cute, versatile, useful and what else? OH and it will keep your desk organized! So amazing how a trash can be really useful!  
Here's a video on how to do your own DIY desktop organizer that you could possibly do at home. This video is from ICON channel on their youtube channel!

What you'll need: 
Jars
Wood panel
Spray paint
Hot glue gun
Step 1: Clean the jars and the wood 
Step 2: Paint the wood and the jars by using your own color of spray paint
Step 3: Glue the jars onto the wood by using the hot glue gun
Step 4: There you have it! A fancy desktop organizer guys!


P/s ALWAYS KEEP YOUR DESK ORGANIZED OKAY! 

Lydia, x


D-I-Y Project : Decor Hacks 3 : Party Disco Ball!

Hello patooties!

How productive was your weekend? I hope each one of you is doing good alright. So, do you guys have any idea on my THIRD decor hacks of the day? I'll give it some clues ya. The first clue is.... dancing. The second one would be....... a BALL. That sums up to be a...... DISCO BALL! hahaha ok that is it. Please have a look at the youtube video below on how to make your own disco ball!

What you'll need:
Paper lanterns
Metallic paper
Curling ribbons
Scissors
Paint brush
Decoupage glue

Step 1: Cut the metallic paper into tiny bits
Step 2: Assemble the paper lantern
Step 3: Use the decoupage glue and apply the cutting metallic paper on the lantern
Step 4: Repeat and cover the entire lantern
Step 5: Cut a 24 inch piece of the curling ribbon
Step 6: Tie the ribbon securely to the lantern
Step 7: Hang it on the wall! Now you are set and ready to go to the PARTY!

I got this AMAZING diy tutorial from HGTV channel! Go and check em' out. They got so many amazing DIY tutorial stuffs that you will be AMAZED. really.

Alright, that is all from me!

Lydia, x

D-I-Y Project : Decor Hacks 2 : Blooming Flowers Lampshade!

Hello dearies!

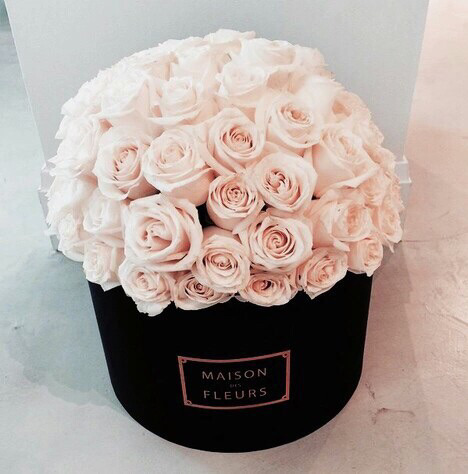
How have you been so far? So guys, I believe every girls have an obsessions over FLOWERS. (I mean, who doesn't right?) The smells of the freshly cut flowers are just..... crazy. Imagine to waking up with these cute bunch of Maison des Fleurs flowers from your loved ones. UGH, aren't they a beauty?
As for today, I got this super drooling cute and home decor that are perfectly perfect to be placed on your bedrooms, or your living hall. Hmm. Never. EVER. underestimate what a boring, plain lampshade can be huh? A BLOOMING FLOWERS LAMPSHADE. omgz, (SO EXCITED TO PUT THIS UP ON BLOG) 

  What You'll Need:A lampshade (of course), Flowers, Glue gun


As easy as 1. 2. 3!

Step 1 : Cut off the stem of the flowers
Step 2: Get your glue gun on and place the flowers on the top of the lampshade first (wait until its dry!)
Step 3: Repeat until it covers the whole lampshade (you can also minimal the design as you want)
Step 4: There you have it! I called it a 'BLOOMING FLOWERS LAMPSHADE'!

Credits to Mr. Kate  for this cute, romantic DIY decor for your home! Go and subscribe her channel guys! 


lydia, x

D-I-Y Project : Decor Hacks 1 : Mirror, Mirror on the Chalkboard!

Hello lovelies!

Do any of you guys know about this girl named Lauren on youtube? Her youtube account's name is LaurDIY . She is also one of my favorite youtubers other than the one and only beautiful Michelle Phan.

Lauren who commercially known as LaurDIY has been socially activated for quite some time now. And most of her videos has reached about 1 million viewers and more.. *facepalm* I highly recommended for the DIY beginners to check her profiles out!

What I LOVE (I really do) about her DIY Project so much is because she often use reused items that you might never know how AWESOME it might turn out to be. For example, like the old antique boring mirror to a chalkboard! (told you how awesome A MIRROR can be) *flipshair*

What You'll Need:
Mirror
1 Bottle of Chalkboard Paint
Small/ Large Paintbrush
Chalk


Step 1: You'll need to clean up the mirror first, to get rid of the dust!
Step 2: Paint the first base coat on the mirror by using the large paintbrush and wait approximately about 30- 40 for it to dry
 Step 3: You may now apply the second layer of the chalkboard paint and sure it covers the whole surface evenly! Wait until it perfectly dry.
Step 4: Get your colored chalks and start decorating! You can doodle up anything you want people! Be creative!!


There you have it! A chalkboard that are made up from the mirror! ENJOY and have fun DIY-ing!
For any questions, mind ask away on the comments boxes below!!

Lydia, x

D-I-Y Project : Wardrobe Hacks 5 : Back To School (NOT) shoes!

Hello slushies!

Evening to all, dearest followers also to the ones who haven't follow me back :-) You have a DAY left before I click on the unfollow button ok. So today, I wanted to do a DIY hacks by using the canvas shoes and some paint! (you are welcome to use your old school shoes to save the budget) Cheers to this youtube master Pink Chocolate Break for her AWESOMENESS on this DIY! Well, if you guys still have your old school shoes, why don't you just use it instead of throwing it away? 


What you'll need:
White canvas shoes
Some acrylic paint 
Roller brush 
Tape
Paint brush

Aren't that the basic things that you probably have it at home?

Step 1: Tape the sole to protect it from getting into the dirt of the paint
Step 2: Start with painting your shoes for the first base coat and let it dry (30 minutes or more)
Step 3: Start to paint it on top of the coat with your design by using the paint brush
Step 4: Let it dry again (approximately about 30 minutes) 
Step 5: Done! Wear it and styled it! 


Lydia, x

D-I-Y Project : Wardrobe Hacks 4 : No Cutting Hobo Bag!

Hello plums!

Are you dolls excited for the next DIY of the day? *crickets* MAYBE NOT. Alright so, for the next DIY on wardrobe hacks, I wanted to share a video that I watched recently on youtube where this one fine lady (OK that sounds like a pervert) named Andreas Choice did a DIY on a cute and the easiest hobo bag that you lazy people are going to LOVE it. Why?? Because it don't required any sewing skills. I had to highlight that. Hahaha. 

Alright, first thing first, please take a 2 minutes moment to watch the youtube video and pondering Miss Andrea's flawless, gorgeous dark shining, healthy skin, and her beautiful, long, curly, hair *bats eyelashes*

What you'll need : 
A tank top
Hair tied

If you are running out of the quota.. don't worry I will type it all down steps by steps..

Step 1 : Flip the tank top used inside out
Step 2 : Wrap the tank top by its straps and then, you gather the tank top together and you measure how deep you want the purse to be
Step 3 : Take the hair tied and tie it as tight as you can
Step 4 : Flip it back again

TADA! you are done, and GOOD to go! I think you can carry this hobo bag anywhere for example, to the gym, to your college, to the party (O don't do drugs or such thing ya) and any other suitable occasions of course!

Lydia, x

D-I-Y Project : Wardrobe Hacks 3 : Recycled Closet Tassel Shirt!

Hello jigglypuffs!

How was your day? I hope everything goes well ya. If you ask me, I would say I had a pretty dull day today.. I got nothing to do at home thus, it leads to another fashion DIY hacks! Haha anyways, I happen to be stumbled onto a website called Million Talks . For those who didn't know, the website is where we could socialize with everyone in every country and talk about any topics that you would like to share. For example.. I typed on 'DIY Fashion' and then, there are many people who shared the tutorials and ideas. Most of the ideas are up to our current trend. While I was busy searching... looking.. scrolling... down the pictures and whatnot. Something caught my attention. I found a DIY fashion ideas on this cute fancy tassel shirt that we can actually do it at home. Imagine from a plain shirt to a very, cute, dangling and fashionable shirt.. WAH.


What you'll need:

A tank top, t shirt (I recommend to use plain shirt to minimal the design)

Tassels

Needle and thread (don't worry it doesn't take much of your sewing skills haha)

Scissors


Ain't it SUPERB easy to do? I love it how the tassels look super cute on the plain shirts. From the boring basic t shirt to the CUTEST RECYCLED TASSEL SHIRT!


Lydia, x

D-I-Y Project : Wardrobe Hacks 2 : Friends Foreva' Bracelets!

Hello and back again alligators!

What's crackin' the egg? Have you guys had your dinner yet? Anyways, I was thinking of doing something crafty today such as.. a friendship bracelets maybe? that you could possibly give it to anyone (whom may concern) as a birthday gifts which I find it very cute where we get to use and design it by our self.  SO, all you need is a some embroidery floss and that. is. it. Before that, I did some review on the internet about this friendship bracelets, most of them said that it was hard to do it. The first step is always the hardest, but eventually.. it will get better! Do not give up, dolls! Your friends might really appreciate it for your efforts! Because obviously, it takes the whole patience to do it. Haha.


What you'll need:
A claws (these are needed for the closure)
Embroidery threads
Scissors (or you can just use your teeth (optional huhu) )


Step 1:  Double up the thread and tie it on the connector of the claws

Step 2:  Take another thread and repeat the first step onto the knot (you'll get like a Auntie Anne's pretzel kind of shape *brb  hungry*)

Step 3: Tie the thread and repeat the Step 2 until the end of the thread

Step 4: Take the claws and tie it to the closure of the thread.

Step 5: THERE YOU GO! a FRIENDS FOREVA' BRACELETS


Happy National Bestfriends Day, people! ok that was random.

Bytheway, you might one to check this website out where they will teach you the other 10 DIY friendship designs that you will DEFINITELY love it! Check them out, lovelies! > GURL

Lydia, x

D-I-Y Project : Wardrobe Hacks 1 : Bib Collar Necklace!

Hey cupcakes!

So, as for the next 5 posts, I am going to blog about some fashion tips that you might found in your wardrobe. This is not just a typical... boring.. fashion tips. but it is MORE like an exciting wardrobe hacks ;) or sort of.. Alright so, since the bib collar necklace is becoming a trend in 2015. Why don't we try and make one? Have faith in me dolls, it is super easy to do and doesn't cost a big amount of money. Yeap. $$$$$ 

You might need:
Some felt
Beads (A LOT OF EM') 
Jewellery glue
Ribbon
Any kind of gemstones/ jewels

Step 1 : Trace the bib necklace design on the cupboard and cut the off

Step 2 : Trace it over the felt and then.. cut if off

Step 3 :  Glue the cupboard that you cut it off earlier with the felt

Step 4:  Glue the jewels based on your own creativity or your favorite design

Step 5:  Cut off the ribbon (doesn't matter the length) and glue the end of it to the bib necklace 

Bam! There you have it, a simple yet elegant Bib Collar Necklace that I am proudly to say that I did it on my own. *tears of happiness* *pats myself*

P/s mind the bad quality of the picture that I took from my webcam..

Credits goes to POP SUGAR girl's guide  for this AWESOME diy! 


Lydia, x

Saturday 29 August 2015

D-I-Y Project : Beauty Hacks 5 : Coffee Toffee!


Hello bunnies! 

How was your day? How do you started off your day? Good? Bad? Nah? Well, I actually started off my day pretty well this morning. I went out with my HIGHSCHOOL sweethearts today and we actually went to Starbucks (where they brewed fresh beans) just for the sake of morning coffee. 

After I got home, suddenly it triggers me to make a DIY coffee scrub that I actually have all the ingredients in the kitchen. Also, they are so many benefits about coffee grounds! That will help your skin to remove the cellulite on your body. So, why not... 


Ingredients: 
1 cup of raw sugar
1/2 cup of ground coffee
1 tablespoon of coconut oil
1 tablespoon of olive oil
1 glass jar

Step 1: Put 1 tbsp of coconut oil in the bowl
Step 2: Mix it well in the bowl altogether with the olive oil
Step 3: By using a different bowl, mix the ground coffee with the raw sugar
Step 4: Mix the first bowl with the second one. Stir it well and mix it until the oil is evenly distributed

Try it on guys! It will definitely leaves your skin feeling' so silky and smooth! And the smells of the coffee is just.... ahhhh *drooling eyes*

Lydia, x

D-I-Y Project : Beauty Hacks 4 : Going Natural Lip Scrub!

Hello lovelies!


How you guys doing? Have you exfoliated your lips today? If you haven’t, then today i am going to share the next beauty hacks product that I find it easy to do with less than 5 ingredients. Yeap, not more than that. First thing first, we basically just need 3 basic ingredients that you probably have it right away at home. (extra points for that) Its insane how beauty tips can be that easy huh?


The picture on your right are obviously the ingredients that you need, brown sugar, honey and olive oil. Whats not to love about going natural hah?


OK so the FIRST STEP is basically the LAST STEP. Haha you just need to mix up all 2 ingredients right away. Mix it until you get the perfect texture for yourself okay? And… *drums roll* AU NATURAL lip exfoliator that are as easy a ABC. 

Lydia, x

D- I- Y Project : Beauty Hacks 3 : Sweet Suga' Scrub!

Hello again lovelies!

So, you are happen to be lucky enough to visit my blog today!! Hahaha. Ok that’s cute.
Alright, shall we start our next D-I-Y with the beauty hacks of the day? As you guys know, our lips need to be exfoliated twice a week. so, whats hurt your pocket money than using the product that you already have at your HOME. Yes people, H-O-M-E. home. First of all, we could save our money rather than we buy the scrubs at shop (that we’re not really sure about the ingredients used huhu) ok whatever, lets chop this mumbling off and start with this sweet sugar DIY lips scrub?


What you'll need:
Salt (pinch or two)
Sugar ( two tablespoon should be alright for the small container)
Olive oil ( 1 tablespoon)
Vaseline (it really moisturizes everything, SERIOUSLY)
Lip balm (it doesn’t need to be new one people)

An empty container (this depends on the amount or scrub that you want to make)


1 STEP: SMASH the used lip balm that you are about to use (it rhymes) you are welcomed to use colored lip balm as for the coloring 

2 STEP: altogether with the Vaseline yep, smash it all out.

3 STEP: mix up SALT and SUGAR in the first ingredients

4 STEP : LAST BUT NOT LEAST, the olive oil. Mix it up together till you think the texture is perfect to apply to your lips
p/s if the texture is a bit watery (this is caused by the exceed amount of olive oil, try add another ts of sugar

5 STEP: VOILA! Have fun and get exfoliated by using this DIY lips scrub! 

Lydia, x


D-I-Y Project : Beauty Hacks 2 : O' Honey!


Evening, dolls! 

Hows it going? Happy Independence day to all Malaysians out there especially to the ones. who. currently. stalking. me. hehe OK I was joking. Anyway, I wanted to give a review on the face mask that I currently obsessed with which is.. the Olive oil + Honey mask! (OK I named it a O' Honey! mask) What I LOVE about it is obviously because of its natural product. I LOVEE GOING NATURAL. Your body will thank you for those ingredients. Seriously.. OK so, shall we start?


The ingredients:
2 tbsp of honey (recommended to use manuka honey)
1 tbsp of extra virgin oil

Step 1: you just need to mix it up real well!
Step 2: heated up in microwave for 20 secs
Step 3: apply the mask on your face (make sure it is warm enough to apply on your face or else you will get BURNED
Step 4: wait for about 5 minutes until it cool it off
Step 5: RINSE! you skin will feel so much hydrated that ever!

YOU'RE WELCOME.
anyways, kudos to my favorite master guru on youtube MICHELLE PHAN! MASTER, U ARE 1 DYNAMITE GAL.


here's are some facts about manuka honey that you might want to know ;)


lydia, x

D-I-Y Project : Beauty Hacks 1 : Hair Repair Mask!

Hello dearies!

So, there are tons of diy #beautyhacks that you can find in any source such google, magazine and whatnot. As for me, I always dig it from the internet since we could just find it within a CLICK. Ok so, im going to share some of it that I find it DEADLY easy to do. So why don’t we start from head to toe first? Haha lets start with the hair mask, shall we?


Above are obviously the ingredients... and the steps taken. 


Alright so, I found this picture from a website called Moody Liscious Spa. there are tons of beauty tips that you could find so mind visit alright ;) so recently, I did a bleach on my hair and the outcome of it I got a very......... pretty…. Dry…. Hair. (and of course that is not what I expected it to be -_-) and then, I googled up the DIY hair mask and put on the DIY mask on my hair and surprisingly, it gets better within 2 weeks! And I was thinking, why don’t I put this up on blog since it works perfectly on my hair. Ok so here it goes guys….  The ultimate DIY hair repair mask.


Lydia, x

Sunday 23 August 2015

New girl on the blog

Greetings everyone! 

Before I start blogging it all out, I just want you guys to know that this is my FIRST time ever to start blogging. I wanted to share one of my interests which is to cut a LOT of cost by going
D-I-Y! so, before we get our hands dirty with some creativity, why don't we start some roughly information about this mysterious blogger that you are about to know? LOL.

Okay everyone, first thing first I am just some plain. boring. girl from Kuala Lumpur, I was born on 8th March 1995. The name's given is Lydia Carlisa, Lydia for short. How do I start with this passions? Alright.. so, basically this was started from just a boring hobby where I really LOVE to reuse an old item as for the decor in my room. Also, I enjoyed watching the DIY's video from youtubers that inspired me SO MUCH.

So, basically.. The objectives of this blog is wanted to guide people (newbies to be precise hehe) to be creative by using a JUNK that you might have it at your storerooms. Next, of course this DIY could help them saving money. For example, a DIY birthday card! Where we don't need so  much materials to do it. Thirdly, I wanted to let the viewers know that we can do so many things by going DIY. Such as, DIY fashions, DIY beauty products and many more! Lastly, besides than saving money by going DIY, we can also EARN money. How? By selling the DIY products of course! Happy D-I-Y ing, dolls!


Lydia, x